A Crafty Celebration for Diwali
This year, Diwali fell on our meeting night. Between Remembrance Day program and Diwali themed program, we felt that since we do our own program as close to Remembrance Day as possible that we would do something fun for Diwali.
In the past, we’ve purchased pre-made Diya lamps, added wax and wicks and just had the Cubs paint them. We’ve also purchased an assortment of sweets for the Cubs to try. During our review in 2014, the Cubs indicated that they would have preferred something a bit more hands on. When we mentioned it at Howlers Council, the Cubs wanted to be a bit more crafty. I accepted the challenge and hosted a Cub Scouter Craft night.
We ended up making our own candle holders (so they are reusable) out of flour and water (also eco-friendly and can be composted) and a sweet that took some testing out to get right. Below are the recipes.
The Cubs absolutely loved being able to make things and have requested that we do more ‘cooking’ this year. I’m going to call it a win and success. Originally I was worried that it was going to be too ambitious and that the Cubs wouldn’t of enjoyed it. I am thrilled that wasn’t the case.
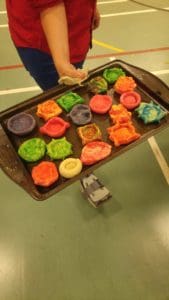 DIY Diya Lamps
prep time: 8 minutes
bake time (optional): 20 minutes (otherwise air dry for 1-2 days)
total time: 10-30 minutes
Easy to make and quick dough to make shapes. This is what we did to make our lamps. Any clay recipe will work.
Ingredients:
- Flour
- Water
- Food colouring
Materials needed:
- Food colouring
- Ziplock bags
- Bowl
- Measuring cups
- Tea lights (1 per Cub)
Special note:
This can be done two ways – baking in an oven or air drying. We have access to an oven at our meeting space so we opted to bake them.
If using the oven, preheat to 350 Fahrenheit (175/under 200 Celsius). It’ll take about 20-25 minutes to bake and then 5-10 minutes to cool to the touch.
Method:
This will take some trial and error. I suggest making this ahead of time so that the Cubs have more time to shape their creations. I found that 1 cup of flour to 2/3 cup of water gave a nice consistency.
- Put flour into a bowl, add water. The dough should be able to hold together on its own – similar to how cookie dough will form. Knead the dough for about 5 minutes so it’ll be solid. Form small balls that are about the size of a golf ball. This will give the kids plenty to work with. You’ll have to play a bit with adding more flour to make sure it’s a good mix.
- Place each ball of dough into a ziplock bag. Give Cubs the option to add food coloring (2-3 drops is more than enough). Show them how to squish the dough and incorporate the dye. It’ll be good to give parents a heads up so their youth can wear a spare shirt underneath that’s okay to get some dye on.
- Once there’s no more liquid dye in the bag, they can pull out the dough and work it more to get the dye either completely mixed in or get a fancy swirl pattern.
- To make the shape, flatten the dough. Pinch the dough together to make a wall. We found that pinching 4 corners worked best to make the shape. Use the tealight to press into the bottom to make sure that it fits and that it’s flattened.
- Place on a flat surface. If you’re opting to use the oven, bake in the oven for 20 minutes or until hard. Remove and allow to cool. Otherwise, you’ll need to take them home and let them dry out over 1-2 days until they are hard.
Optional: Decorate with paint, beads, sequins, whatever you have available. Due to time constraints and how we organized the meeting, we didn’t do this.
Other ways to have fun making lamps:
Paraffin or soy wax chips can be bought by the bag from craft stores or online from Amazon, as can ready waxed wicks.
- Hollowed out oranges make fragrant burners. You can also use coconut or sea shells, vintage tea or egg cups, and jars that can be painted in different colours.
- Warm the wax and pop the wick into your chosen holder. Rest it on a stand or hold in place using tongs. Pour in the wax and allow to set. This will take longer and may not work out for a meeting but a camp.
I’ve never done any of these methods.
 Coconut Laddu Sweets (also know as Snowballs)
prep time: 10 minutes
total time: 10 minutes
No bake coconut laddu (snowballs). They’re the perfect dessert or snack for people who want something sweet made quickly with 3 ingredients.
Ingredients:
- Shredded Coconut
- Maple Syrup (or Agave Syrup)
- Flour (or Almond Flour)
Materials:
- Ziplock bags
- Measuring spoons
Special Note:
Using almond flour is highly recommended. You can DIY this by taking almonds and running them through a food processor. Once the almonds are crushed and in a powder like form, it’ll work the same as flour. Just be careful if you have someone with a nut allergy.
Method:
I used 1/8 Cup of coconut, 1 tablespoon of flour, and 2 teaspoons of maple syrup, roughly. This doesn’t have to be an exact measurement.
- Add all items to the ziplock and get the Cubs to mix away. It takes anywhere from 5-15 minutes for the cubs to fully mix.
- Take out of the ziplock and make balls with your hands.
- Enjoy!
Optional: roll in coconut on a ball to coat the balls.
Extras can be kept in a sealed container (handy those ziplock bags) in the fridge for up to a week.
Notes:
- If the dough is too dry, add more syrup and if it’s too watery, add more shredded coconut or almond flour.
- Feel free to use store-bought almond flour or blend raw almonds in a food processor or powerful blender.
- I’ve only made this recipe using maple syrup, but I think any syrup will do.
I pre-made a ball and gave small samples to the Cubs before they started their sweet. It gave them a good indication of what it should look like. No one could guess what was in it aside from the coconut. Several of the Cubs referred to it as a ‘power ball’ and have requested that they make it for going on hikes.
Happy Diwali!